To utilize Facebook’s powerful advertising capabilities and especially the remarketing/retargeting campaigns, you first need to install Facebook’s pixel code on your Website.
This post will show you step-by-step on how to install the Facebook pixel in WordPress.
What is a Facebook Pixel?
A ‘pixel’ is just a piece of javascript code that gives Facebook the ability to track visits to your website and associate these with actions (web page visits, conversions, etc.) and Facebook accounts.
When you install the Facebook Pixel to your website, you will be able to measure conversions, build custom audiences and optimize your Facebook ad campaigns.
In simple terms, the pixel will give you a lot of metrics and data related to visitors coming to your website from Facebook.
Without installing the Pixel, you won’t be able to measure the effectiveness and profitability of your Facebook campaigns.
What is the difference between a Facebook Pixel and a Facebook R
A lot of people get confused because of the terminology used by different guides; to clear things out, there is only one Facebook Pixel and this can be used for various purposes i.e. track website visits, for remarketing and conversion tracking.
In the past, you had to add different pieces of code for tracking Facebook conversions and for remarketing but as of July 2016, there is only one Pixel that can be used for all Facebook tracking needs.
How to install the Facebook Remarketing Pixel (Step by Step)
Before getting into the exact steps on how to generate the pixel code and install it on your WordPress website, you need to know that you can have only one pixel per ad account.
This means that once you create the pixel you can install it on multiple domains but these domains should be under the same ad account.
If you have multiple websites to manage and want to create a separate pixel for each one, then you first need to register for a Facebook Business Manager account.
A Facebook Business Manager account allows you to manage more than one ad accounts using the same interface. This is useful for digital marketing agencies or for companies that need to have their Facebook campaigns isolated in different ad accounts.
My recommendation is to go with the Business Manager option if you want to run FB campaigns for more than one website. It will be easier to manage and the reporting will be more accurate and less prone to errors.
Step 1: Create a New Pixel
Login to your Facebook account and go to Ads Manager.
Click the menu (top left) and select PIXELS (under Assets).

Click the CREATE A PIXEL button.
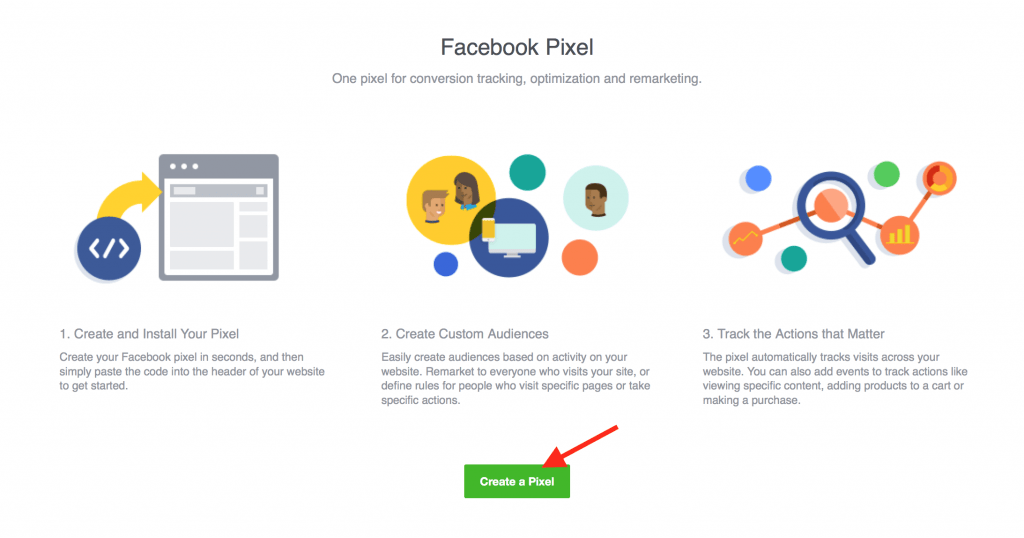
You will be prompted to enter a name for your Pixel. Enter a name and click the CREATE PIXEL button.
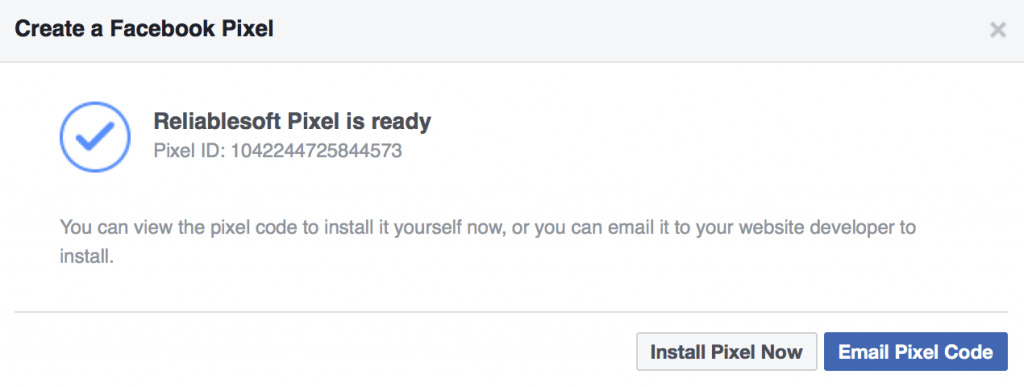
That’s it, your pixel is ready! The next step is to install the pixel code to your WordPress Website.
STEP 2: Install Facebook Pixel Code in WordPress
Click the INSTALL PIXEL NOW button to view your pixel code.
You should see a screen like this:
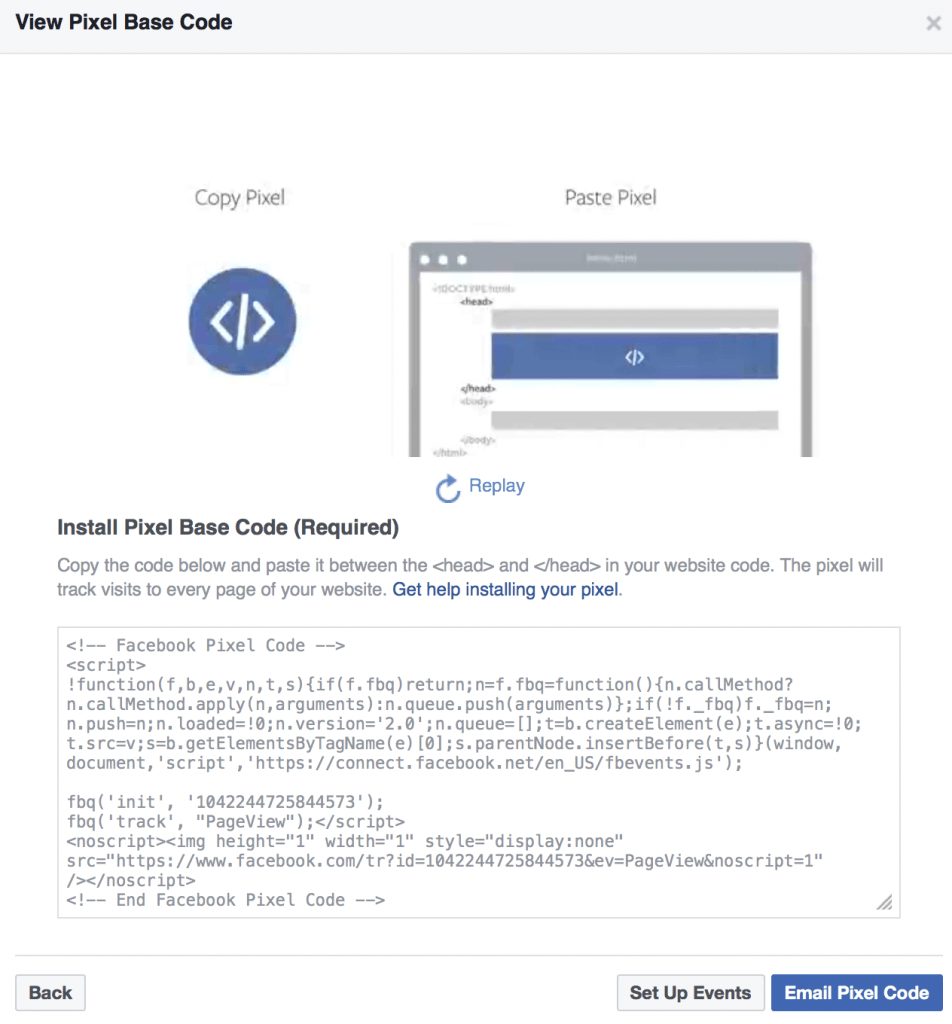
As you can see, Facebook recommends that you install the Pixel Code in the <head></head> of your website.
Some WordPress themes have an option that allows you to install scripts to run in the header or footer. If your theme supports this, then all you have to do is copy the code from the above box and paste it to the HEADER section of your website.
Caution: Having too many scripts in your header, may slow your website down and this is bad for SEO. Read our WordPress SEO Practices for more tips on how to optimize your WordPress Website.
If your theme does not support this, follow the steps below:
- Install and activate the AddFunc Head & Footer Code from the WordPress Repository (it’s free). This will allow you to easily add the script to the website header.
- Under Settings (WordPress Left Menu), find and click HEAD & FOOTER CODE.
- Just COPY/PASTE the Pixel code provided by Facebook in the “SITE-WIDE HEAD CODE” section and click the SAVE CHANGES button.
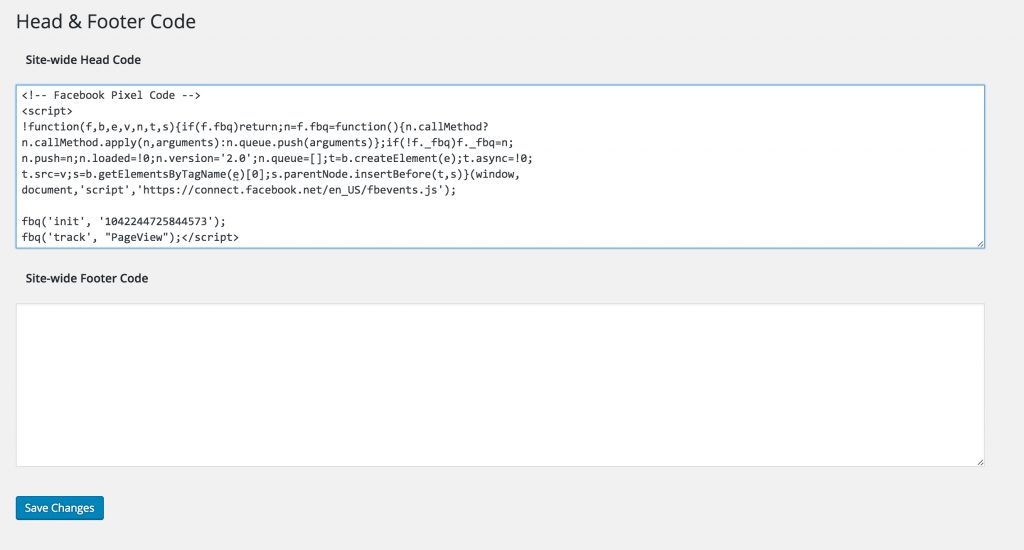
That’s it! Now that you have completed the above steps, Facebook will track visits (Views) to your website.
STEP 3: Check that the Facebook Pixel is installed correctly
Before proceeding with the next steps, we need to check and ensure that the Facebook Pixel is installed and working ok.
The easiest way to do this is to use the Facebook Pixel Helper. The Pixel helper is a free extension provided by Facebook but works only on Chrome Browsers.
After you install the Pixel Helper you will notice a small icon ![]() in your browser address bar.
in your browser address bar.
Navigate to a page of your website (that the pixel is installed) and click that icon.
If everything is ok, you should see something similar to the screenshot below with the message ‘Pixel loaded successfully’.
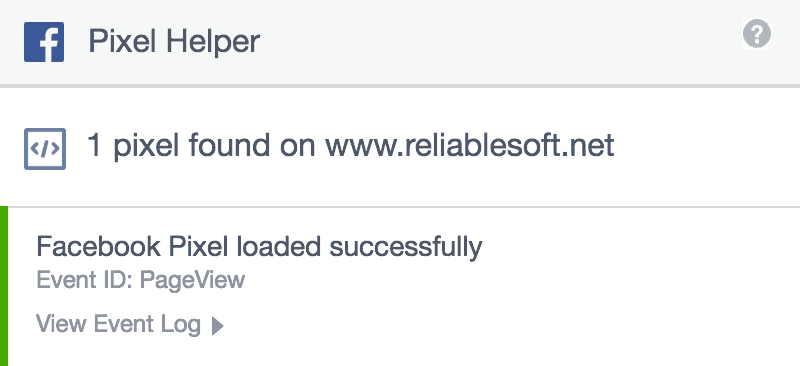
In case you see an error do one of the following:
- Go through the above steps again and make sure that you added the code to the header of your website.
- Empty your website’s cache (if you are using a caching plugin or CDN).
- Read this troubleshooting guide from Facebook.
Step 4: Understanding Facebook Events
So far what we did is install the Facebook Pixel to ALL your website’s pages. This means that Facebook can now track which pages a visitor views but not yet conversions or custom audiences.
To be able to measure conversions or create remarketing campaigns on FB, you need to add event tracking code to your Facebook Pixel or create custom conversions (no code addition is required).
What are Facebook Events?
When a visitor performs a specific action on your website, this is considered an event. For example, when an item is added to a shopping cart or when a purchase is completed or even when a particular page is visited.
A complete list of supported events is shown below:
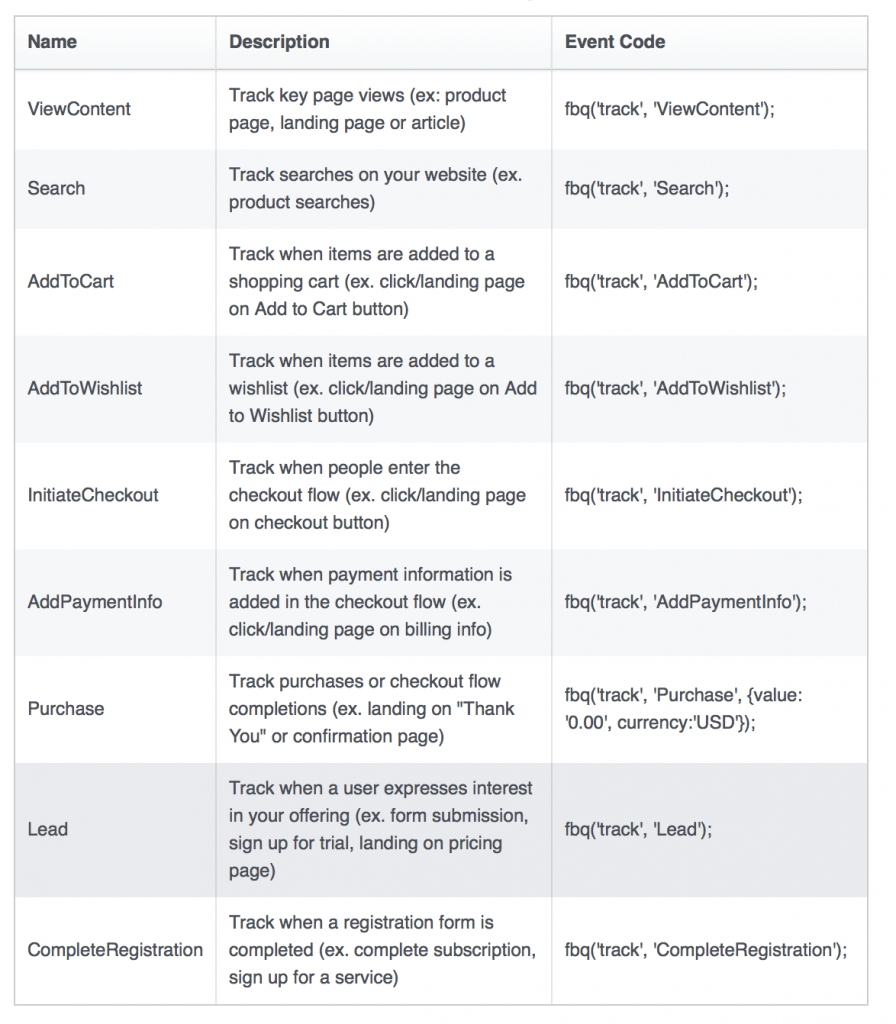
In order for Facebook to know the occurrence of an event, you need to modify your code on the particular page and add within your pixel code the particular event tracking code, as shown in the list above.
Step 5: Adding Event Code to Individual Pages
For example, if you want Facebook to track form submissions (e.g. newsletter subscriptions), you need to add this piece of code fbq(‘track’,’Lead’); to your existing pixel code but only on the page that is shown to the user after the form submission was successful.
When the page is viewed, the event will trigger and Facebook will know that the particular user has submitted a form on your website.
To achieve this, follow the steps below:
The AddFunc Head & Footer Code plugin (installed above), besides giving you the ability to add sitewide header code, it also adds 2 extra boxes on all your website pages for adding header and footer code specific to that page.
The screenshot below shows the LEAD tracking code added to my Newsletter subscription ‘Thank you’ Page.
Notice that the tracking code is enclosed in <script></script> tags.

Don’t forget to use the Facebook Pixel Helper to make sure that your Facebook tracking codes are working ok.
Step 6: Enable Conversion Tracking and Create Custom Audiences to use in Remarketing Campaigns
Once your pixel is installed and you have a clear understanding of how to use event tracking, your next step is to add the relevant tracking code to your pages and start tracking Facebook Conversions.
To start using the remarketing/retargeting features of Facebook, you need to create custom audiences and set up your Facebook campaigns.
Conversion tracking and Facebook remarketing will be covered in detail in subsequent posts so make sure that you subscribe to our newsletter to get notified of new updates.Share


