How to add cPanel email account to Outlook.com webmail
This guide describes how to add the cPanel email account to Outlook.com webmail:
1. Log in to your account here: https://mail.live.com
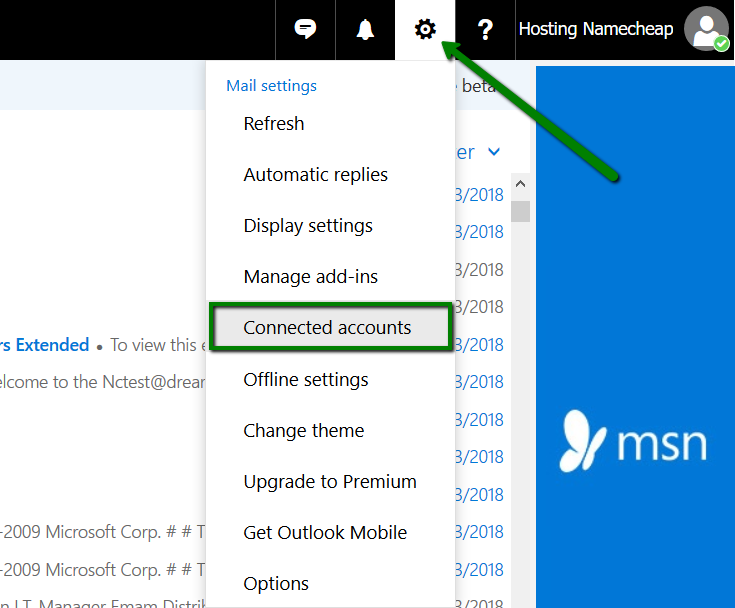
2. Click on the gear icon on the upper right part of the mailbox page and choose Connected Accounts:
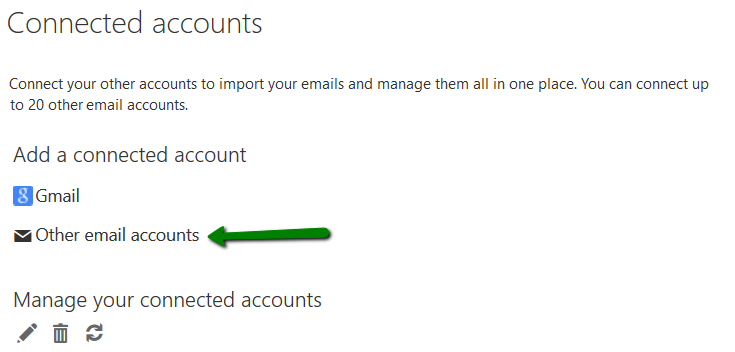
3. Under Add a connected account, click Other email accounts:
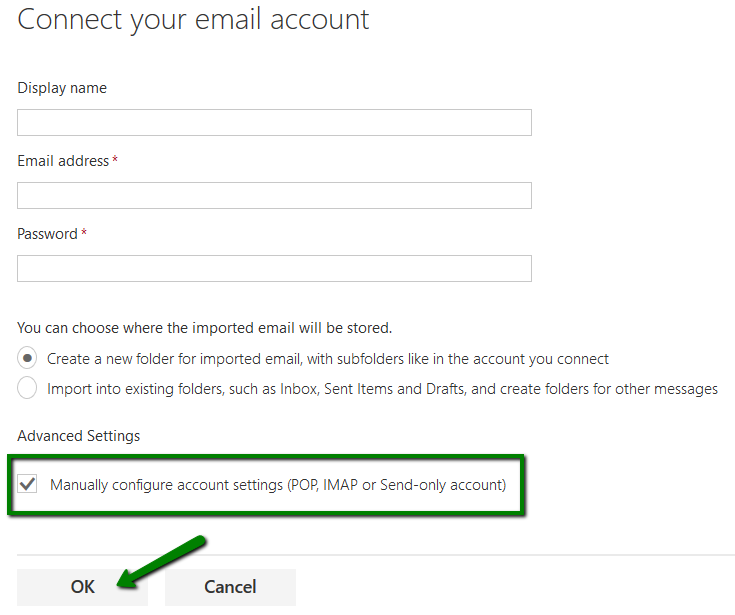
4. Select Manually configure account settings and click OK:
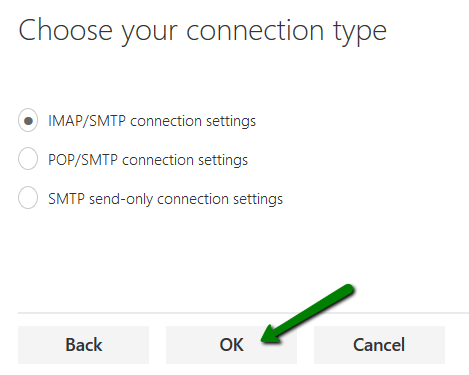
5. Select type of the account IMAP / SMTP or POP3 / SMTP and click OK:
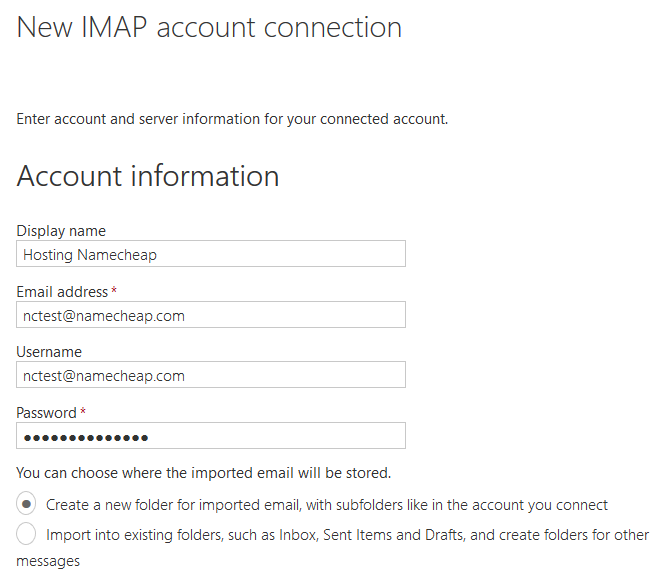
6. On the next page configure the settings as follows:
For IMAP account:
Display name: enter the name you would like to see in the FROM field
Email address: full mailbox name
Username: full mailbox name
Password: password for your cPanel mailbox
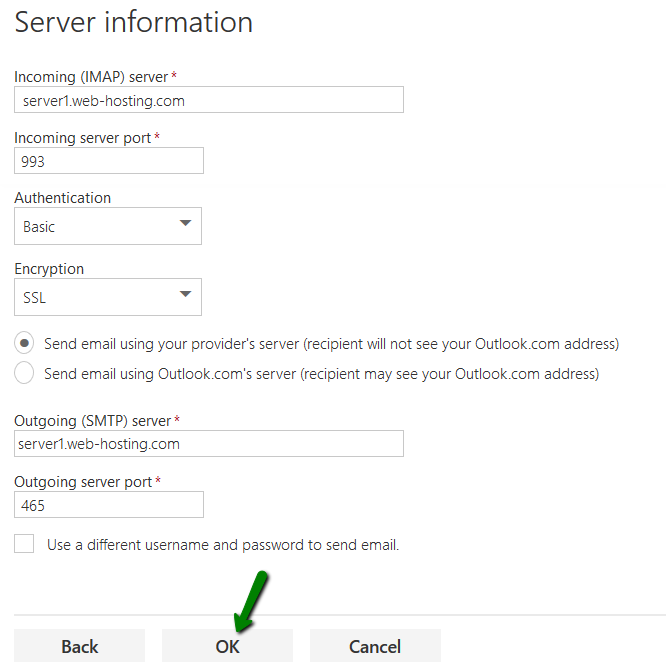
Server information
Incoming (IMAP) server: server your account is hosted on
Incoming server port: 993 with SSL, or 143 with no SSL
Authentication: Basic
Encryption: SSL or TLS
Outgoing (SMTP) server: server your account is hosted on
Outgoing server port: 465 with SSL, 587 with TLS
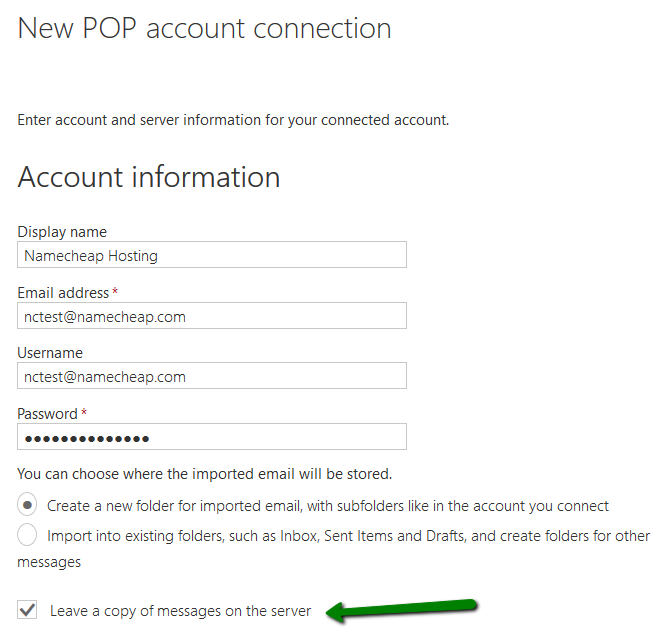
For POP3 account:
Display name: enter the name you would like to see in the FROM field
Email address: full mailbox name
Username: full mailbox name
Password: password for your cPanel mailbox
Select Leave a copy of messages on the server (if required)
Server information
Incoming (POP) server: server your account is hosted on
Incoming server port: 995 with SSL or 110 with TLS
Authentication: Basic
Encryption: SSL or TLS
Outgoing (SMTP) server: server your account is hosted on
Outgoing server port: 465 with SSL or 587/25 with TLS
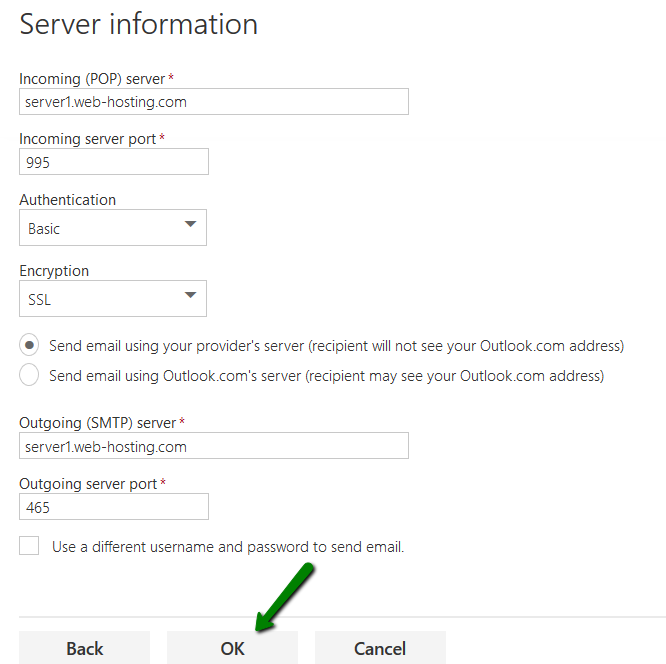
7. Click OK once done.
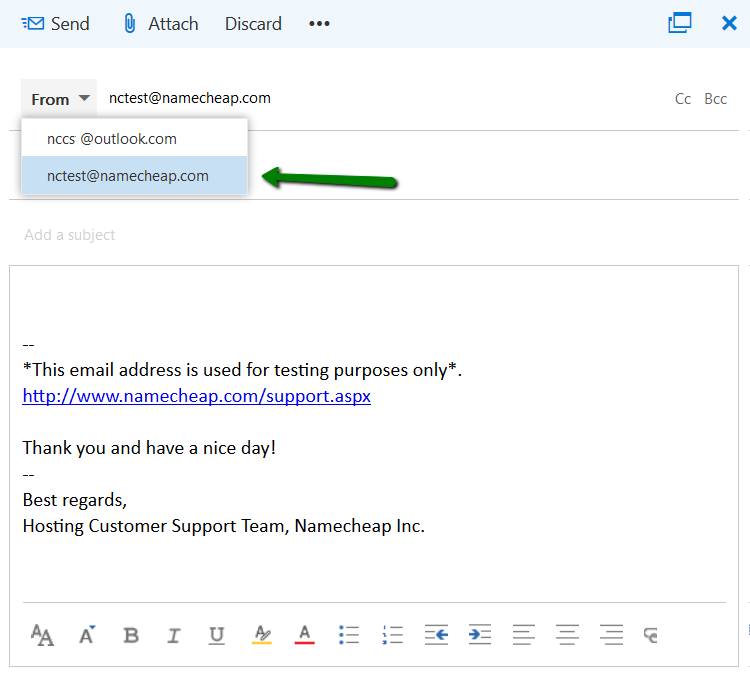
8. After adding your third-party email account as a send-and-receive successfully on Outlook.com, you will be able to use ‘send as’ option when creating new emails. Simply click on the drop-down menu next to your Outlook email address and choose your cPanel email account:
That’s it!


